
|
|

InstallationEven while the HD160 is lower than standard cases, there's quite a lot space inside, thanks to the clever design. In my situation, the computer won't be used for gaming so a bit older hardware will do just as fine - as long as it stays silent. Neither does it have to have much HDD space as movies can be streamed through LAN or played from a DVD. Hardware going to the case:
|
With the main goal being silent operation instead of performance use, this setup is sufficient. For full functionality most of you would for example want to get a wlan-card and a digi-tv-card to complement the setup.
Installation
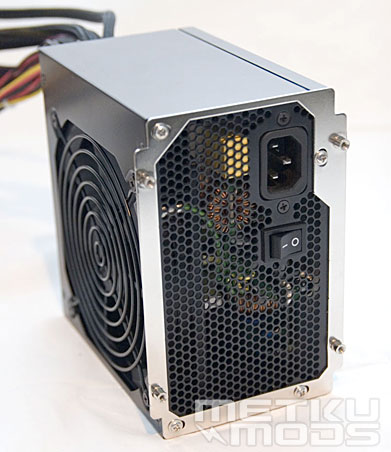
PSU
First component to go to the case is the PSU. Mounting it to the HD160 is a two phase operation. First its mounted to a bracket which then can be screwed in place either sucking air from the case or through the mesh on the side wall. In the test rig there were a PSU with 120 mm fan in the side so I decided to mount it sucking air from outside. It's good to keep in mind where you are gonna place your computer. There's better be some space for the airflow next to the case.
There's also a tiny support bit for the PSU which I didn't find neccessary. It would possibly come in need if the case was a normal tower model and the PSU longer and heavier than normally.
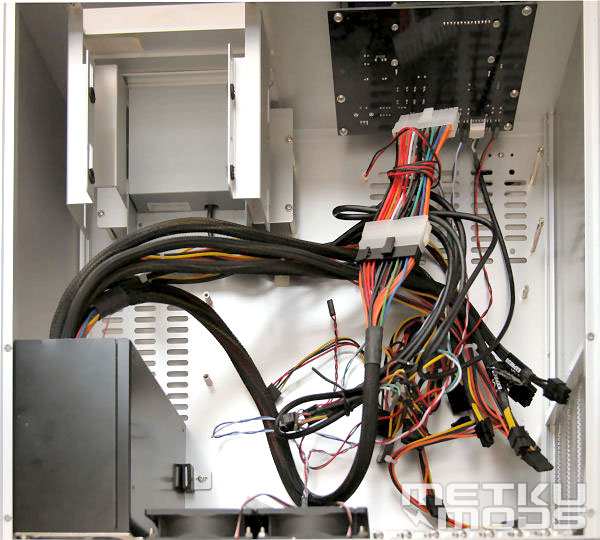
Wires
After the PSU was installed it became obvious that some serious cable management was needed. The case itself has pretty much wires for all the integrated goodies and the PSU makes the situation look very chaotic.
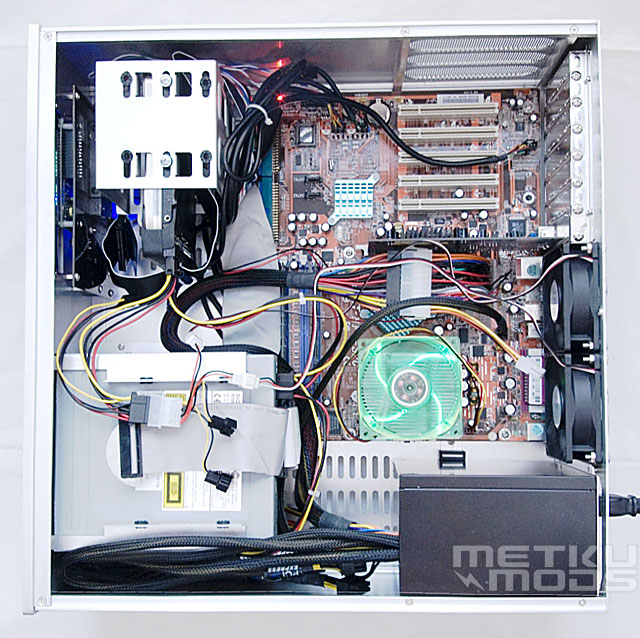
Next phase in setup is to mount the motherboard and after that HDDs and DVD-drive. Both cages are removable, HDD-cage with four and DVD-cage with six tiny screws. Installing the optical drive is pretty straight forward but HDDs are a bit tougher. The whole HDD-cage must be first disassembled, then assembled again and after that tighten the actual screws holding the HDD in place.
There are anti vibration pads for the hard disks unlike for the DVD drive. In total there are one external 3,5" and one 5,25" bay and four internal 3,5" drivebays.
Almost there...
Original plan was to use a Thermaltake Sonic Tower as CPU-cooler but thanks to its huge size, it didn't fit inside the case. Plan B was to use way too noisy stock cooler with a silent fan. Another, even greater mishap was to find that the VGA-card used this time didn't accept neither of the GPU coolers reviewed earlier. The original cooler sounded terrible so during noise level tests an even older card with passive cooling was used.

Optical drive
When the DVD-drive is in place it's time to change the bezel. First you must get the tray out, straighten a paper clip and stick it into the hole in the front panel, making the tray come out. The bezel should get loose just by lifting and bending it gently. Then comes the trick; press the tray back in, rip of the shield from the double sided tape in the aluminum bezel. Fold some paper or use a credit card as a spacer between the bezel and the front panel of the case. This should leave just the right sized gap for the bezel to move freely.
A detail I really like in the design of the HD160 is the space between the DVD-cage and the side wall. It's a great place to stuff all the non-needed wires from the PSU. Even it gets pretty crowded but is a clear sign of a working design.
| | Pages: 1 2 3 4 5 6 | |
 Content in english!
 Sisältö suomeksi!
