
|
|

Internals

Easy Access
SB62G2 can be disassembled quite easily. Top cover is held in place with three thumb screws. Remove them and the cover slides off smoothly. Front panel is held together with four screws and the drive cage comes off after you remove two screws. Usually you don't need to remove the front panel at all but I thought that modders would like to hear that it consists of two pieces; the frame that houses the buttons etc. and the "face" of the panel that is make out of brushed aluminum. This makes it easy to mod windows to the sides, add LCD and TFT display modules and lights to the front of the case.
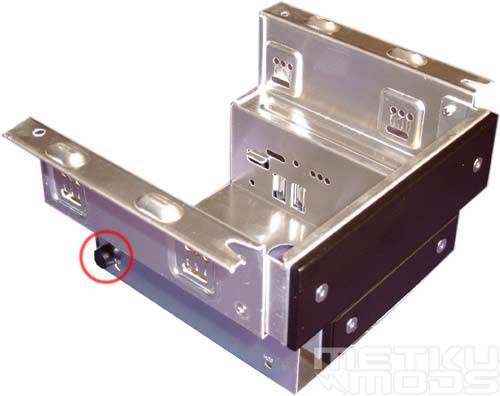
Drive cage
Cage can hold two 3.5" devices and one 5.25" drive or control panel. If you still want to use that old floppy drive, you have room for just one HDD. Because today's BIOSes are flashable from Windows and operating systems can be installed by using only a CD, there is very little need for a floppy drive any more. If you need to carry those small documents between your office and home, USB memory devices offer a lot more storage space with smaller physical dimensions. They are also a lot more durable and offer safer storage for your valuable information. This means that you could use the space reserved for that floppy drive for a second hard drive.
You can install all the devices to their places while the cage is removed from the SB62G2. After this you can pop the cage back in from the top and hook the drives up. Really easy and fast method and this is good because by removing the cage you gain a lot more freedom to work inside the case.
Noticed that little red circle in the image? Inside this circle you can see a small rubber pad sitting all alone. This is one of these small little details that Shuttle has added to the unit that makes our lives a lot easier. Purpose of this pad is to keep the addon cards that you install from touching the metal frame of the drive cage. Nothing would be as frustrating as frying your display adapter with a short circuit when you accidently nudge your system while power is turned on.
![]()
Side access
When the drive cage is removed the user has easy access to every corner of the case. While it is easy to get into this stage it is quite rare that you need to strip down the case in this manner. You only need access to the center part of the case when you are changing memory modules or the CPU. Memory can be changed quite easily even without removing the drive cage so upgrading different components in future is made as stress free as possible. Legends of those old knuckle brusing and blood spilling installations are fading away. These small systems are joy to work with.
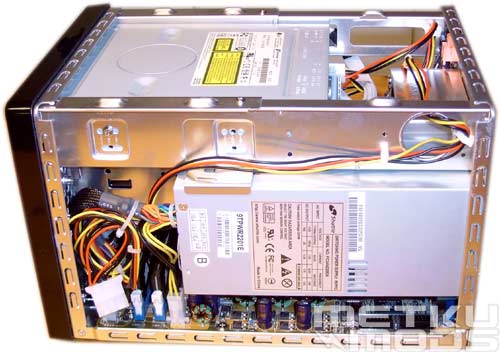
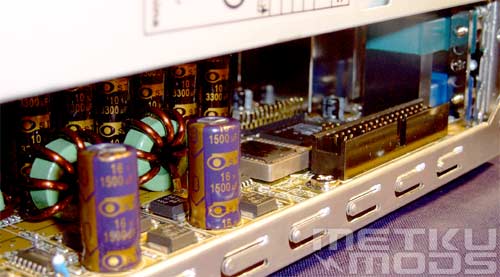
Power supply side
Power supply is located on the side of the case. This allows more space for the CPU cooling and I see no problems with this installation method. Unit offers three 4-pin Molex connectors, one 3-pin floppy power connector, one SATA power connector and set of ATX and ATX12V (P4) power connectors. These should be enough for most of the users because the case offer space for maximum of three 4-pin devices (for example 2xHDD + 1 optical).
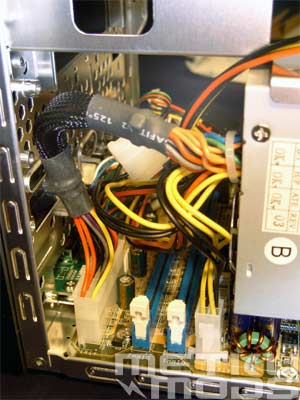
Cable sleeving
Again a small little detail that catches the eye. Cable sleeving, even this short will keep the wires nicely packed and from getting into your way.
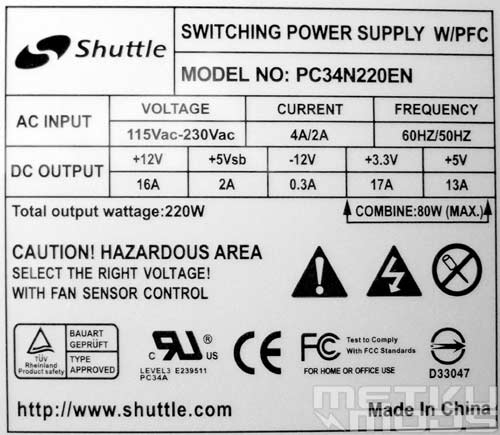
PSU label
PSU is rated for 220 watts and this should be enough for almost every setup you can imagine of installing. I had no problems during the testing period with different display adapters, HDDs, CPUs etc. Sure, if you are planning peltier cooling or something as drastic you may want to steer clear from these small barebones completely but then again, for most of the users I see no problems with this PSU.
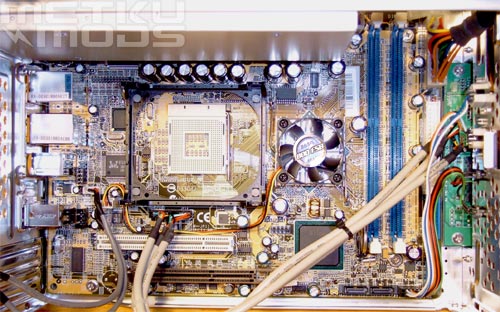
Top view
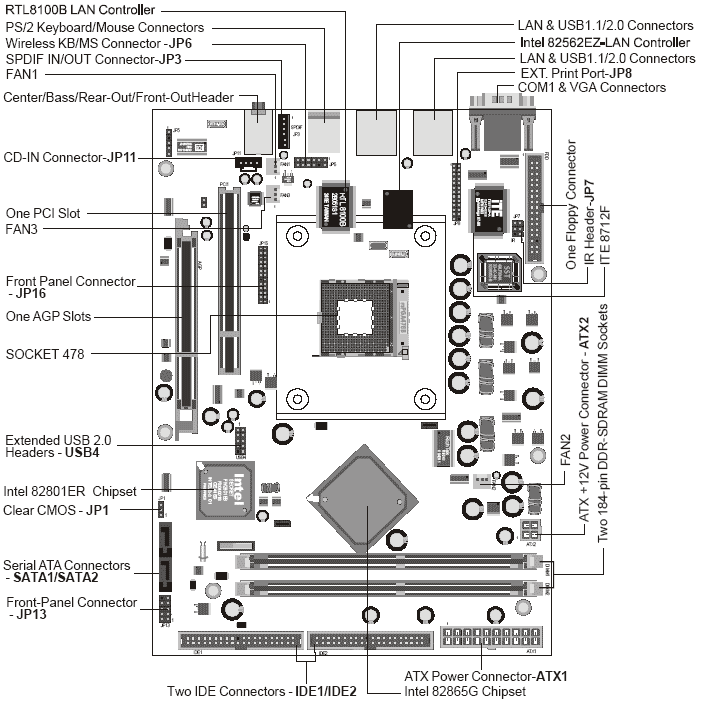
Diagram
If you are changing the CPU or making the initial installations, this is the view from the top when the drive cage is removed. Again, very clean and easy access to everything. Clickable diagram above gives you the detailed placement of different ports, headers and components on the board.
Floppy connector
One of the odd features of the board was the floppy connector that is located under the power supply. A moment ago I told you why you wouldn't need to use that floppy in the first place so it makes sense to place the connector to the place where it affects the usage of the rest of the unit the less. Because of the small dimensions of the SB62G2, the floppy connector sits quite close to the floppy drive if installed so the cable isn't going to be that long.
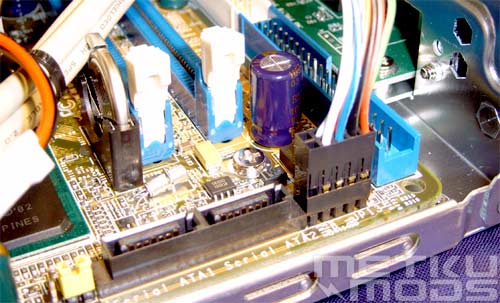
Sata and IDE-connectors + jumper to clear bios.
Serial ATA connectors are sitting next to the IDE connectors on the front part of the motherboard making them easy to access and use. Clearing jumper for BIOS is also well situated so you don't have to try to reach it from an awkward position.
| | Pages: 1 2 3 4 5 6 7 8 | |
 Content in english!
 Sisältö suomeksi!